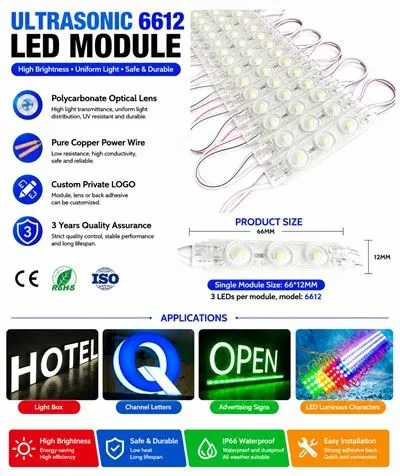
Installing LED strip lights on a ceiling can transform a room, adding a touch of ambiance and functionality. As a leading supplier of high - quality LED strip lights, I'm excited to share a comprehensive guide on how to achieve this installation successfully.
1. Planning Your Installation
Before you start the actual installation, careful planning is essential. First, measure the area of your ceiling where you want to install the LED strip lights. This will help you determine the length of the strip lights you need. Our 3030 LED Light Strip comes in various lengths, allowing you to choose the most suitable one for your ceiling.
Next, decide on the layout. You can create a simple border around the perimeter of the ceiling, or get more creative with patterns like zig - zags or grids. Consider the overall aesthetic of the room and how the lighting will complement it. Also, think about the color temperature of the lights. Warmer colors (around 2700K - 3000K) create a cozy and inviting atmosphere, while cooler colors (5000K - 6500K) are more suitable for task - oriented areas.
2. Gathering the Necessary Tools and Materials
To install LED strip lights on your ceiling, you'll need the following tools and materials:
- LED Strip Lights: Choose the right type of strip lights for your needs. Our 12V RGB LED Neon Light offers a wide range of colors, perfect for creating a dynamic lighting effect.
- Power Supply: Make sure the power supply is compatible with the voltage requirements of your LED strip lights. Most common LED strip lights operate at 12V or 24V.
- Connectors and Adapters: These are used to join different sections of the LED strip lights and connect them to the power supply.
- Double - sided Tape or Mounting Clips: To secure the LED strip lights to the ceiling.
- Scissors or a Utility Knife: For cutting the LED strip lights to the desired length.
- Screwdriver: If you need to mount the power supply or other components.
3. Preparing the Ceiling
Clean the ceiling surface where you plan to install the LED strip lights. Remove any dust, dirt, or debris. This will ensure that the double - sided tape or mounting clips adhere properly. If the ceiling has a rough or uneven surface, you may need to sand it down or use a leveling compound to create a smooth base.
4. Cutting the LED Strip Lights
Most LED strip lights have cutting marks at regular intervals. Use scissors or a utility knife to cut the strip lights at these marks. Make sure to cut straight and cleanly to avoid damaging the LEDs. After cutting, you can use connectors to join the sections back together if needed.
5. Mounting the LED Strip Lights
Peel off the backing of the double - sided tape on the back of the LED strip lights. Carefully press the strip lights onto the ceiling, following your pre - planned layout. If you're using mounting clips, attach them to the ceiling first and then slide the LED strip lights into the clips.
It's important to leave some slack at the ends of the strip lights for connecting to the power supply. Also, make sure the strip lights are evenly spaced and aligned for a professional look.
6. Connecting the Power Supply
Once the LED strip lights are mounted, it's time to connect them to the power supply. Follow the manufacturer's instructions carefully. Usually, you'll need to connect the positive and negative wires of the LED strip lights to the corresponding terminals on the power supply. Use wire connectors or soldering to ensure a secure connection.
If you're using a dimmer switch or a controller, connect it between the power supply and the LED strip lights. This will allow you to adjust the brightness and color of the lights.
7. Testing the LED Strip Lights
Before fully securing the power supply and hiding the wires, test the LED strip lights to make sure they're working properly. Plug in the power supply and turn on the lights. Check for any dead LEDs or connectivity issues. If you encounter any problems, double - check your connections and make any necessary adjustments.
8. Hiding the Wires
To achieve a clean and professional look, hide the wires as much as possible. You can use cable management solutions such as wire channels or raceways. These can be painted to match the ceiling color for a seamless appearance.
9. Final Checks
Once the installation is complete, do a final check of the LED strip lights. Make sure they're securely mounted, the connections are tight, and the wires are hidden. Test the lights again to ensure they're functioning correctly.
Why Choose Our LED Strip Lights
As a reliable LED strip light supplier, we offer a wide range of high - quality products. Our DC12V Outdoor Waterproof LED Light Strip is perfect for both indoor and outdoor applications. Our lights are energy - efficient, long - lasting, and come with a warranty. We also provide excellent customer support to assist you with any installation or technical issues.
If you're interested in purchasing our LED strip lights for your ceiling installation or any other project, we encourage you to contact us for a detailed quote and to discuss your specific requirements. Our team of experts is ready to help you find the best lighting solutions for your needs.


In conclusion, installing LED strip lights on a ceiling is a relatively straightforward process that can significantly enhance the look and feel of a room. By following these steps and using high - quality products, you can achieve a professional - looking installation that will impress your guests and provide years of reliable lighting.
References
- General knowledge of LED strip light installation from industry experience.
- Manufacturer's instructions for various LED strip light products.