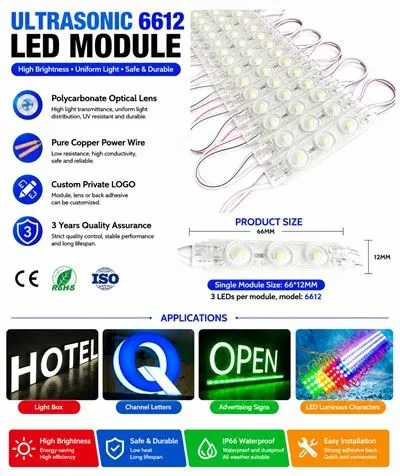
Hey there! I'm a supplier of RGB 4LED Modules, and today I'm gonna walk you through the process of installing these cool modules on a wall. Whether you're looking to add some funky lighting to your room, a business space, or just want to experiment with some DIY lighting, this guide is for you.
What You'll Need
First things first, let's talk about what you'll need for this installation. Besides the RGB 4LED Modules, you'll need a few basic tools. A drill is essential for making holes in the wall to mount the modules. You'll also need screws and wall anchors to secure the modules firmly. A screwdriver, either a flat - head or a Phillips - head depending on the screws you use, is a must - have. And don't forget about electrical tools! A wire stripper will come in handy for connecting the wires, and electrical tape to insulate the connections.
Oh, and if you want to control the color and brightness of your RGB 4LED Modules, you'll need a controller. You can find some really cool controllers in the market that allow you to change colors, create different lighting effects, and even synchronize the lights with music.
Preparing the Wall
Before you start drilling, you need to prepare the wall. Decide where you want to install the RGB 4LED Modules. You might want to create a pattern, like a straight line, a curve, or a custom design. Measure the space and mark the spots where you'll drill the holes. Make sure the wall is clean and free of dust and debris. You can use a damp cloth to wipe it down if it's dirty.
Installing the Modules
Now, let's get to the fun part - installing the modules. Take one of the RGB 4LED Modules and hold it against the wall where you marked the spots. Use the drill to make holes in the wall. Be careful not to drill too deep or too shallow. Once the holes are made, insert the wall anchors into the holes. Then, place the module back on the wall and use the screws to secure it. Do this for all the modules you want to install.
Wiring the Modules
After the modules are securely mounted on the wall, it's time to wire them up. Each RGB 4LED Module has wires coming out of it. Usually, there are positive and negative wires for the power supply, and additional wires for the different colors (red, green, and blue). You'll need to connect these wires together.
First, connect the power wires. You can use a wire stripper to remove a small section of the insulation from the ends of the wires. Then, twist the positive wires together and the negative wires together. Wrap the connections with electrical tape to insulate them and prevent any short - circuits.
Next, connect the color wires. You can connect them in parallel if you want all the modules to have the same color and lighting effects. If you want to have more control over each module, you can connect them to a controller with individual channels for each color.
Connecting to a Power Source
Once the modules are wired together, you need to connect them to a power source. Most RGB 4LED Modules operate on a low - voltage power supply, like 12V or 24V. You can use a power adapter to convert the standard household voltage (110V or 220V) to the appropriate voltage for the modules. Make sure the power adapter has enough wattage to power all the modules you installed.
Connect the power wires from the modules to the power adapter. Double - check all the connections to make sure they are secure.
Testing the Installation
Before you call it a day, it's important to test the installation. Plug in the power adapter and turn on the power. If everything is wired correctly, the RGB 4LED Modules should light up. You can use the controller to change the colors and lighting effects. If you encounter any problems, like some modules not lighting up or the colors not being right, check the connections and make sure all the wires are properly connected.
Troubleshooting
If you face any issues during the installation or testing, don't worry. Here are some common problems and solutions.
- Some modules not lighting up: Check the connections of the non - lighting modules. Make sure the wires are properly connected and there are no loose connections. Also, check if the module itself is damaged.
- Wrong colors: This could be due to incorrect wiring. Check the color wires and make sure they are connected to the right channels on the controller.
- Flickering lights: Flickering lights can be caused by a poor power supply. Check if the power adapter has enough wattage to power all the modules. You might need to upgrade to a more powerful power adapter.
Other Cool Products
If you're interested in other LED products, we also offer some really great options. For example, our 12V LED RGB Module is a popular choice for those who want a simple and easy - to - install LED lighting solution. It's very energy - efficient and can create some amazing lighting effects.
Our Sign Letter Led Module is perfect for businesses that want to create eye - catching signs. These modules are bright, durable, and come in different sizes and colors.
And if you're looking for a more powerful and high - quality LED light, check out our 12V 24V COB Led Light. COB (Chip on Board) technology provides a more uniform and intense light output.
Contact for Purchase
If you're interested in our RGB 4LED Modules or any of our other LED products, we'd love to hear from you. Whether you have questions about the installation process, want to get a quote, or just want to discuss your lighting needs, feel free to reach out. We're here to help you create the perfect lighting solution for your space.


References
- LED Lighting Installation Manuals from various manufacturers
- Online forums and communities for DIY lighting projects
- Technical guides on LED technology and wiring