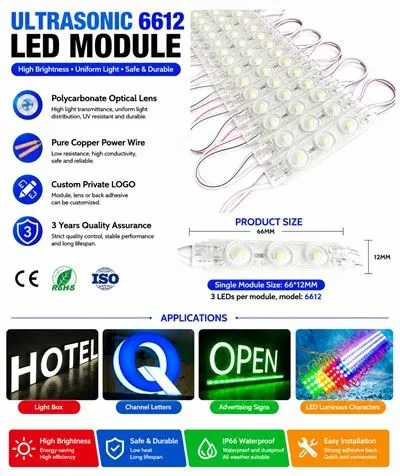
SMD (Surface Mount Device) LED modules have become increasingly popular in recent years due to their energy efficiency, long lifespan, and high brightness. As a trusted SMD LED module supplier, I understand the importance of providing clear and comprehensive guidance on how to install these modules properly. In this blog post, I will walk you through the step-by-step process of installing SMD LED modules, ensuring that you can enjoy their benefits with ease.
Step 1: Gather the Necessary Tools and Materials
Before you begin the installation process, it's essential to gather all the tools and materials you'll need. Here's a list of items you should have on hand:
- SMD LED modules: Choose the appropriate type and quantity of SMD LED modules for your project. For example, you might consider our 12v Led Module 1.5W or 12v Ultrasonic Led Module Light depending on your specific requirements.
- Power supply: Ensure that you have a compatible power supply for your LED modules. Check the voltage and current requirements of the modules and select a power supply that can provide the necessary power.
- Soldering iron and solder: If your LED modules require soldering, make sure you have a good-quality soldering iron and the appropriate solder.
- Screwdriver: You may need a screwdriver to mount the LED modules or secure them in place.
- Mounting brackets or adhesive tape: Depending on the installation method, you'll need mounting brackets or adhesive tape to attach the LED modules to the desired surface.
- Wire cutters and strippers: These tools are necessary for cutting and stripping the wires to connect the LED modules to the power supply.
Step 2: Plan the Installation
Proper planning is crucial for a successful installation. Here are some key considerations:
- Determine the location: Decide where you want to install the SMD LED modules. Consider factors such as the purpose of the lighting, the available space, and the visibility of the modules.
- Measure the area: Measure the dimensions of the area where you'll be installing the LED modules to ensure that you have enough modules to cover the space adequately.
- Plan the wiring: Sketch out a wiring diagram to visualize how you'll connect the LED modules to the power supply. This will help you avoid any wiring errors and ensure a safe and efficient installation.
Step 3: Prepare the Surface
Before installing the LED modules, you need to prepare the surface. Here's what you should do:
- Clean the surface: Use a clean cloth or sponge to wipe the surface where you'll be mounting the LED modules. Remove any dust, dirt, or debris to ensure a good adhesion or a secure fit.
- Mark the mounting holes: If you're using mounting brackets, mark the locations of the mounting holes on the surface using a pencil or a marker. Make sure the holes are evenly spaced and aligned with the holes on the mounting brackets.
- Drill the holes: If necessary, use a drill to create the mounting holes. Make sure the holes are the appropriate size for the screws or bolts you'll be using.
Step 4: Install the LED Modules
Now it's time to install the SMD LED modules. Follow these steps:
- Attach the mounting brackets: If you're using mounting brackets, attach them to the surface using the screws or bolts. Make sure the brackets are securely fastened.
- Place the LED modules: Carefully place the LED modules on the mounting brackets or the prepared surface. Align them properly and ensure that they are level.
- Connect the wires: Use wire cutters and strippers to cut and strip the wires of the LED modules and the power supply. Connect the positive and negative wires of the LED modules to the corresponding terminals of the power supply. Make sure the connections are secure and insulated to prevent any short circuits.
- Solder the connections (if required): If your LED modules require soldering, use a soldering iron to solder the wire connections. Make sure the solder joints are clean and free of any cold solder joints.
- Secure the modules: Once the wires are connected, use adhesive tape or screws to secure the LED modules in place. Make sure they are firmly attached and won't move or come loose.
Step 5: Test the Installation
After installing the LED modules, it's important to test the installation to ensure that everything is working properly. Here's how you can do it:


- Turn on the power supply: Plug in the power supply and turn it on. Check if the LED modules light up. If they don't, double-check the wiring connections and make sure the power supply is working correctly.
- Check the brightness and color: Observe the brightness and color of the LED modules. Make sure they are consistent and meet your expectations. If you notice any issues, such as uneven brightness or color variations, check the wiring connections or the LED modules themselves.
- Inspect the installation: Check the mounting of the LED modules to ensure that they are secure and stable. Make sure there are no loose wires or connections that could pose a safety hazard.
Step 6: Troubleshooting
If you encounter any problems during the installation or testing process, here are some common issues and solutions:
- LED modules not lighting up: Check the wiring connections to ensure that they are correct and secure. Make sure the power supply is providing the correct voltage and current. If the modules still don't light up, there may be a problem with the LED modules themselves. Contact the manufacturer or supplier for further assistance.
- Uneven brightness or color: This could be due to a wiring issue or a problem with the LED modules. Check the wiring connections and make sure they are balanced. If the problem persists, you may need to replace some of the LED modules.
- Overheating: If the LED modules are overheating, it could be a sign of a power supply issue or improper ventilation. Check the power supply to ensure that it is providing the correct power and that the LED modules are not being overloaded. Make sure there is adequate ventilation around the modules to prevent overheating.
Step 7: Maintenance and Care
To ensure the long lifespan and optimal performance of your SMD LED modules, follow these maintenance and care tips:
- Keep the modules clean: Regularly clean the LED modules using a soft, dry cloth to remove any dust or dirt. Avoid using abrasive cleaners or solvents that could damage the modules.
- Check the connections: Periodically inspect the wiring connections to ensure that they are secure and free of any corrosion or damage. If you notice any loose connections, tighten them immediately.
- Replace faulty modules: If you notice any LED modules that are not working properly or have a significant decrease in brightness, replace them as soon as possible to maintain the overall performance of the lighting system.
In conclusion, installing SMD LED modules can be a relatively straightforward process if you follow the proper steps and take the necessary precautions. By gathering the right tools and materials, planning the installation carefully, and following the installation instructions, you can achieve a successful and professional-looking installation. If you have any questions or need further assistance, don't hesitate to contact us. As a leading SMD LED module supplier, we are committed to providing our customers with high-quality products and excellent customer service. We offer a wide range of SMD LED modules, including AC220V LED Backlight Module, to meet your diverse lighting needs. Whether you're a DIY enthusiast or a professional installer, we can help you find the right LED modules for your project. Contact us today to discuss your requirements and start your lighting project with confidence.
References
- LED Lighting Basics, U.S. Department of Energy
- Installation Guide for SMD LED Modules, Manufacturer's Manual