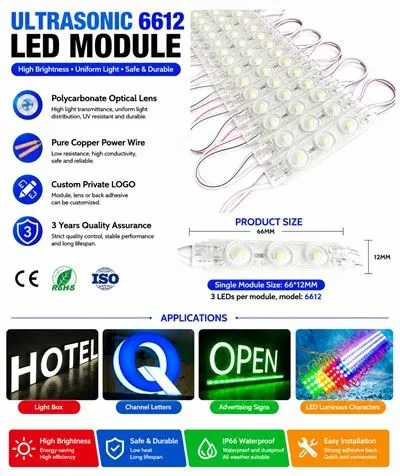
Replacing a 24V COB (Chip on Board) LED light might seem like a daunting task, but with the right guidance, it can be a straightforward process. As a seasoned supplier of 12V and 24V COB LED lights, I've helped numerous customers through this process. In this blog, I'll walk you through the steps to replace a 24V COB LED light effectively and safely.
Understanding 24V COB LED Lights
Before diving into the replacement process, it's crucial to understand what 24V COB LED lights are. COB LED lights are a type of LED lighting technology where multiple LED chips are directly mounted onto a substrate, creating a single lighting module. The 24V refers to the voltage required to power the light. These lights are known for their high brightness, energy efficiency, and long lifespan. They are commonly used in various applications, including commercial lighting, residential lighting, and automotive lighting.
Tools and Materials You'll Need
- Screwdriver: Depending on the type of fixture, you may need a Phillips or flathead screwdriver to remove the cover or housing.
- Wire strippers: If you need to connect or disconnect wires, wire strippers will come in handy.
- New 24V COB LED light: Make sure to choose a replacement light that matches the specifications of your existing one. You can find a wide range of 3030 LED Edge Modules, 2835 12v Single Led Module, and 2835 Led Module Lighting on our website.
- Electrical tape: To insulate the wires and prevent any short circuits.
- Safety glasses and gloves: It's always a good idea to protect your eyes and hands when working with electrical components.
Step-by-Step Replacement Process
Step 1: Turn off the Power
The first and most important step is to turn off the power supply to the light fixture. This can usually be done by switching off the circuit breaker or removing the fuse associated with the lighting circuit. Make sure to double-check that the power is off by testing the light switch.
Step 2: Remove the Old Light
Once the power is off, carefully remove the cover or housing of the light fixture. This may involve unscrewing a few screws or simply popping off the cover. Be gentle to avoid damaging the fixture. Once the cover is removed, locate the old 24V COB LED light. Depending on how it's installed, you may need to disconnect the wires or remove the mounting screws. Use your screwdriver or wire strippers as needed.
Step 3: Disconnect the Wires
If the old light is connected to the power source via wires, you'll need to disconnect them. Use the wire strippers to carefully remove the insulation from the ends of the wires, exposing the metal conductors. Then, gently pull the wires apart to disconnect them from the old light. Make sure to note which wire is connected to which terminal for proper reconnection later.
Step 4: Install the New Light
Take the new 24V COB LED light and position it in the same location as the old one. If the new light has mounting holes, align them with the holes in the fixture and secure it using the mounting screws. If it's a wire-connected light, connect the wires to the corresponding terminals on the new light. Make sure the connections are tight and secure.


Step 5: Reconnect the Wires
Once the new light is installed, reconnect the wires to the power source. Match the wire colors or markings to ensure proper polarity. Use the wire strippers to strip the ends of the wires again, if necessary, and twist the conductors together. Then, cover the connections with electrical tape to insulate them and prevent any short circuits.
Step 6: Replace the Cover or Housing
After the wires are connected, carefully replace the cover or housing of the light fixture. Make sure it fits snugly and is properly aligned. If there are screws, tighten them securely to hold the cover in place.
Step 7: Turn on the Power
Once the cover is replaced, turn on the power supply by switching on the circuit breaker or replacing the fuse. Test the light switch to see if the new 24V COB LED light is working properly. If the light doesn't turn on, double-check the connections and make sure the power is flowing correctly.
Tips and Precautions
- Read the Manual: Before attempting to replace the light, read the manufacturer's instructions or manual for both the light fixture and the new 24V COB LED light. This will provide you with specific guidance and safety information.
- Use the Right Tools: Using the correct tools will make the replacement process easier and safer. Avoid using tools that are too big or too small for the job.
- Test the Light: Before installing the new light, test it to make sure it's working properly. This can save you time and hassle in case the light is defective.
- Seek Professional Help: If you're unsure about any part of the replacement process or if you're dealing with a complex lighting system, it's best to seek the help of a professional electrician.
Conclusion
Replacing a 24V COB LED light is a relatively simple process that can be completed with a few basic tools and some careful attention to detail. By following the steps outlined in this blog, you can safely and effectively replace your old light with a new one. If you have any questions or need further assistance, don't hesitate to contact us. As a leading supplier of 12V and 24V COB LED lights, we're here to help you find the right lighting solutions for your needs. Whether you're looking for 3030 LED Edge Modules, 2835 12v Single Led Module, or 2835 Led Module Lighting, we've got you covered. Contact us today to discuss your requirements and start your procurement process.
References
- General knowledge about LED lighting technology and electrical safety.
- Experience gained from working as a 12V and 24V COB LED light supplier.